If you’re running a Mac and wish to capture a video of your screen there is a very easy and free way to do it using Quicktime, which is provided with your Mac. Let’s see how to do it.
Steps Overview
- Start New Screen Recording on Quicktime
- Start Quicktime
- Click on
File->New Screen Recording
- Record your Screen
- Click on the Record button (Red dot)
- Click again to record the whole screen, or drag to record part of the screen
- Stop the recording, trim and export
- Click on the stop button to stop
- If you want to trim click on
Edit->Trim - Export by clicking on
File->Export
Step 1 Start New Screen Recording on Quicktime
Step 1A Start up Quicktime
If it’s not in your dock then you can find it in the Applications folder or just search for the name in spotlight.
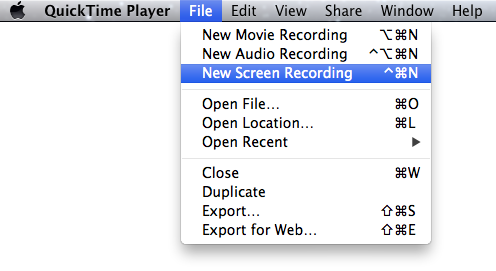
Step 1B Click on File -> New Screen Recording
Step 2 Record your Screen
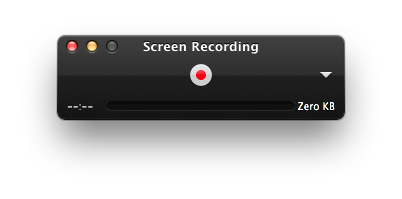
Step 2A Click on the Record button (Red dot)
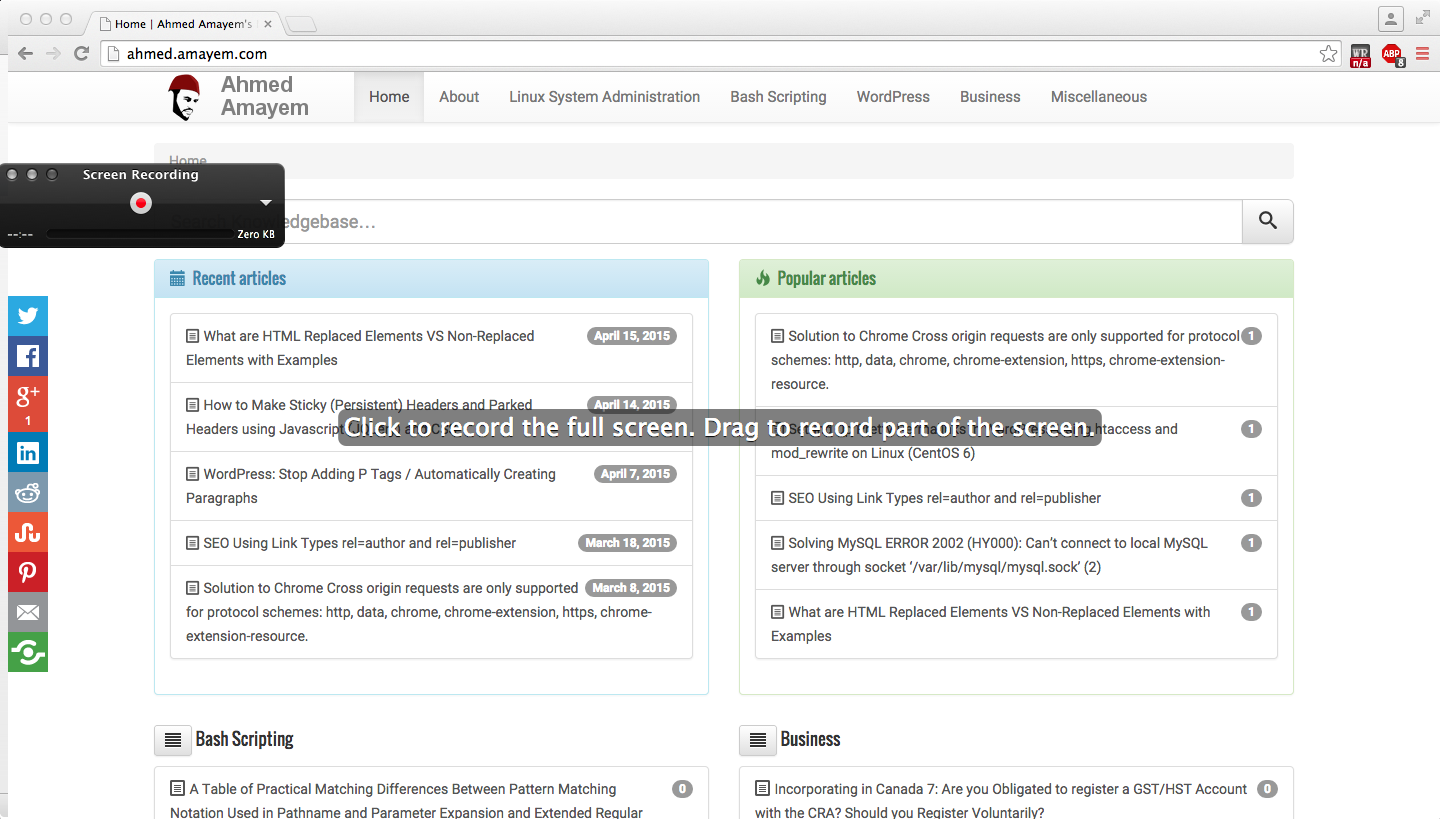
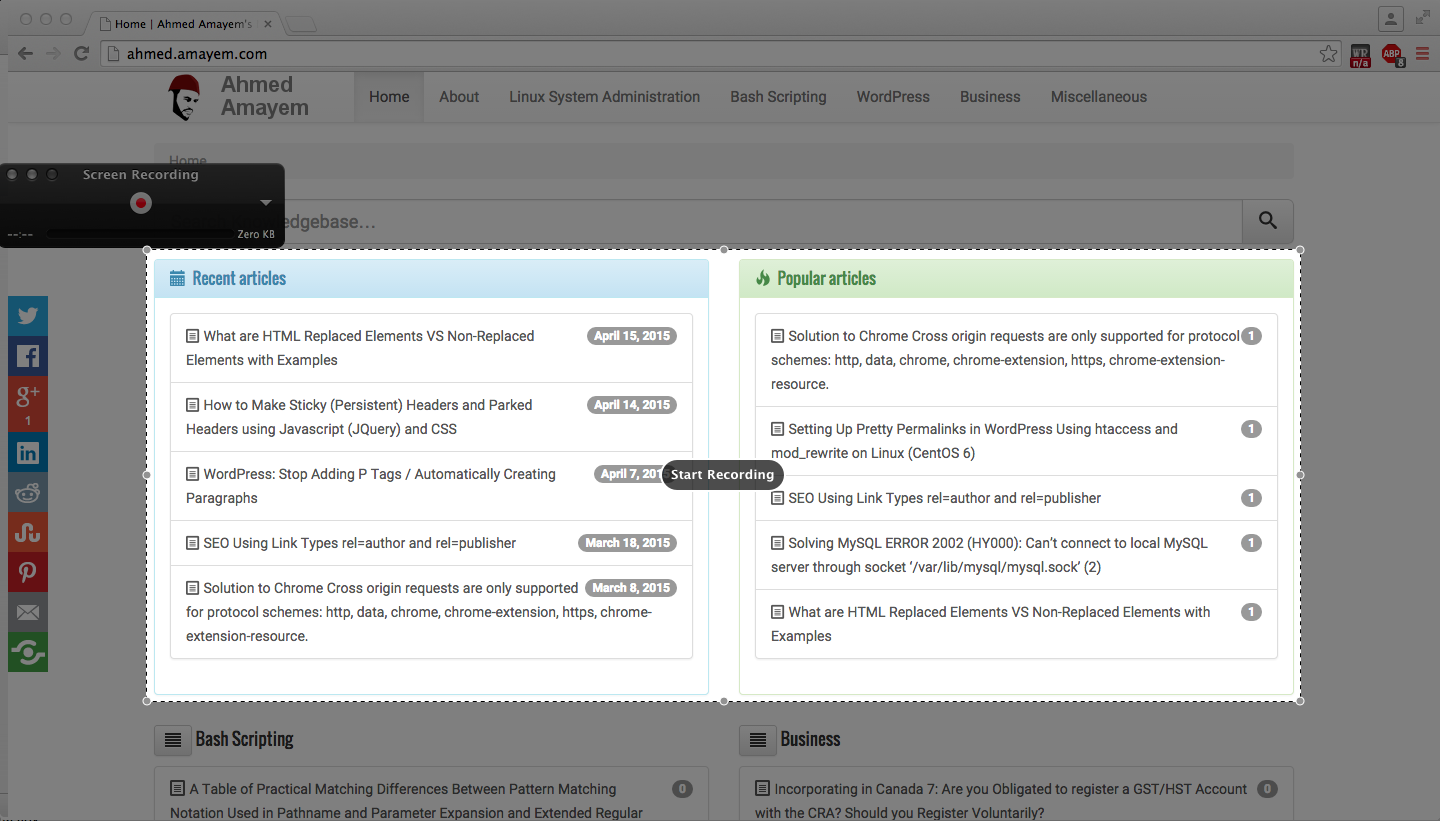
Step 2B Choose Area to Record and Record
Click again to record the whole screen, or drag to record part of the screen.
Step 3 Stop the Recording, Trim and Export
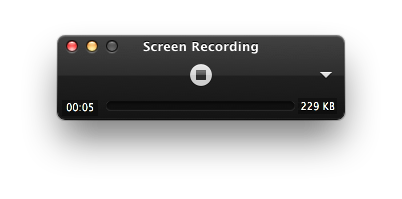
Step 3A Stop the Recording
Click on the stop button to stop.
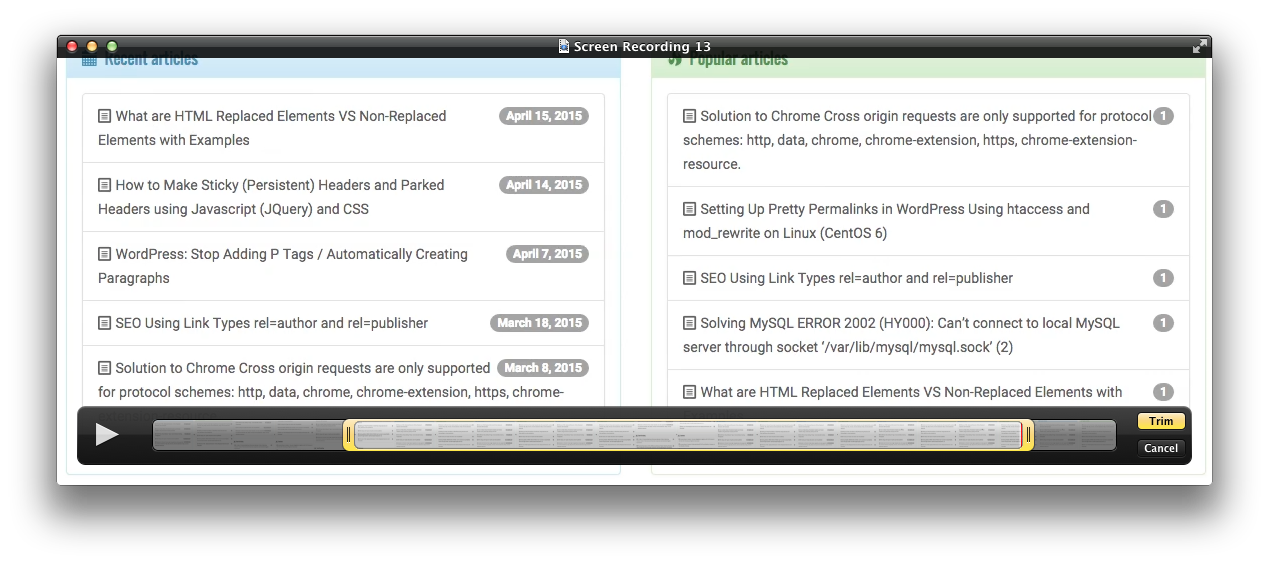
Step 3B Trim
If you want to trim click on Edit -> Trim. You may want to trim that last part where you press on the stop record button.
Step 3C Export
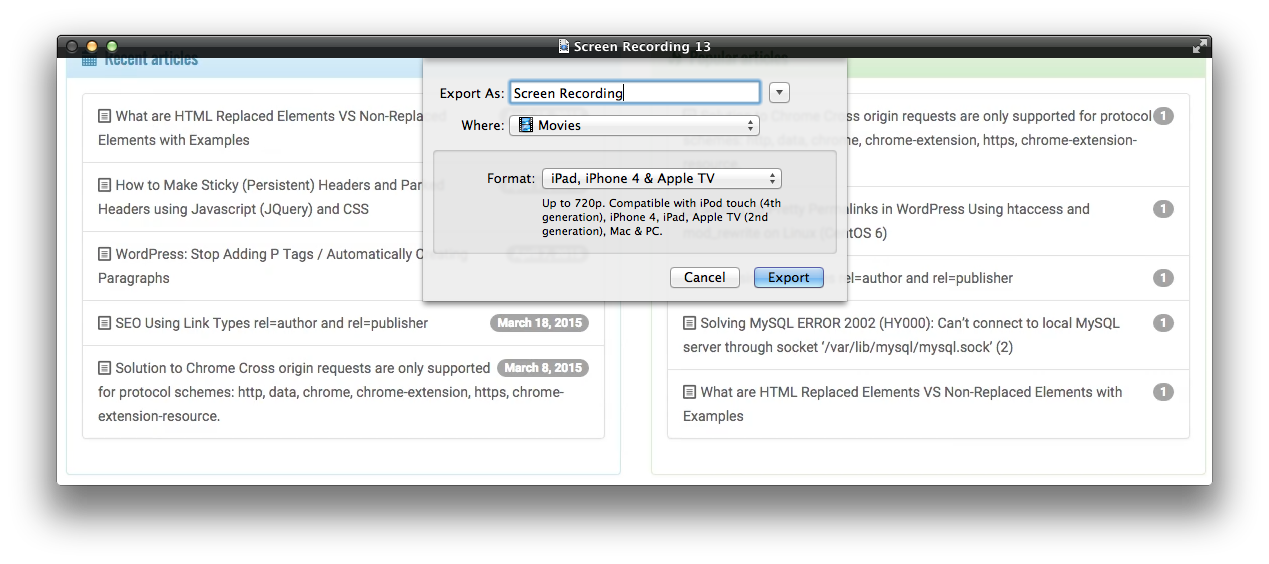
Export by clicking on File -> Export
Choose where you want to export it. There are several formats that allow you to export it with different qualities. You may also like to choose the Export for Web option, which will make a folder and put in it several exports of the video at different qualities so that it can be used on different platforms, such as on mobile platforms.

